Your Cart is Empty
Offering ShopPay at Checkout. Buy Now, Pay Later!
Offering ShopPay at Checkout. Buy Now, Pay Later!

Resin Art for Halloween: Spooky Designs with Epoxy
October 21, 2025 3 min read
Resin Art for Halloween: Spooky Designs with Epoxy
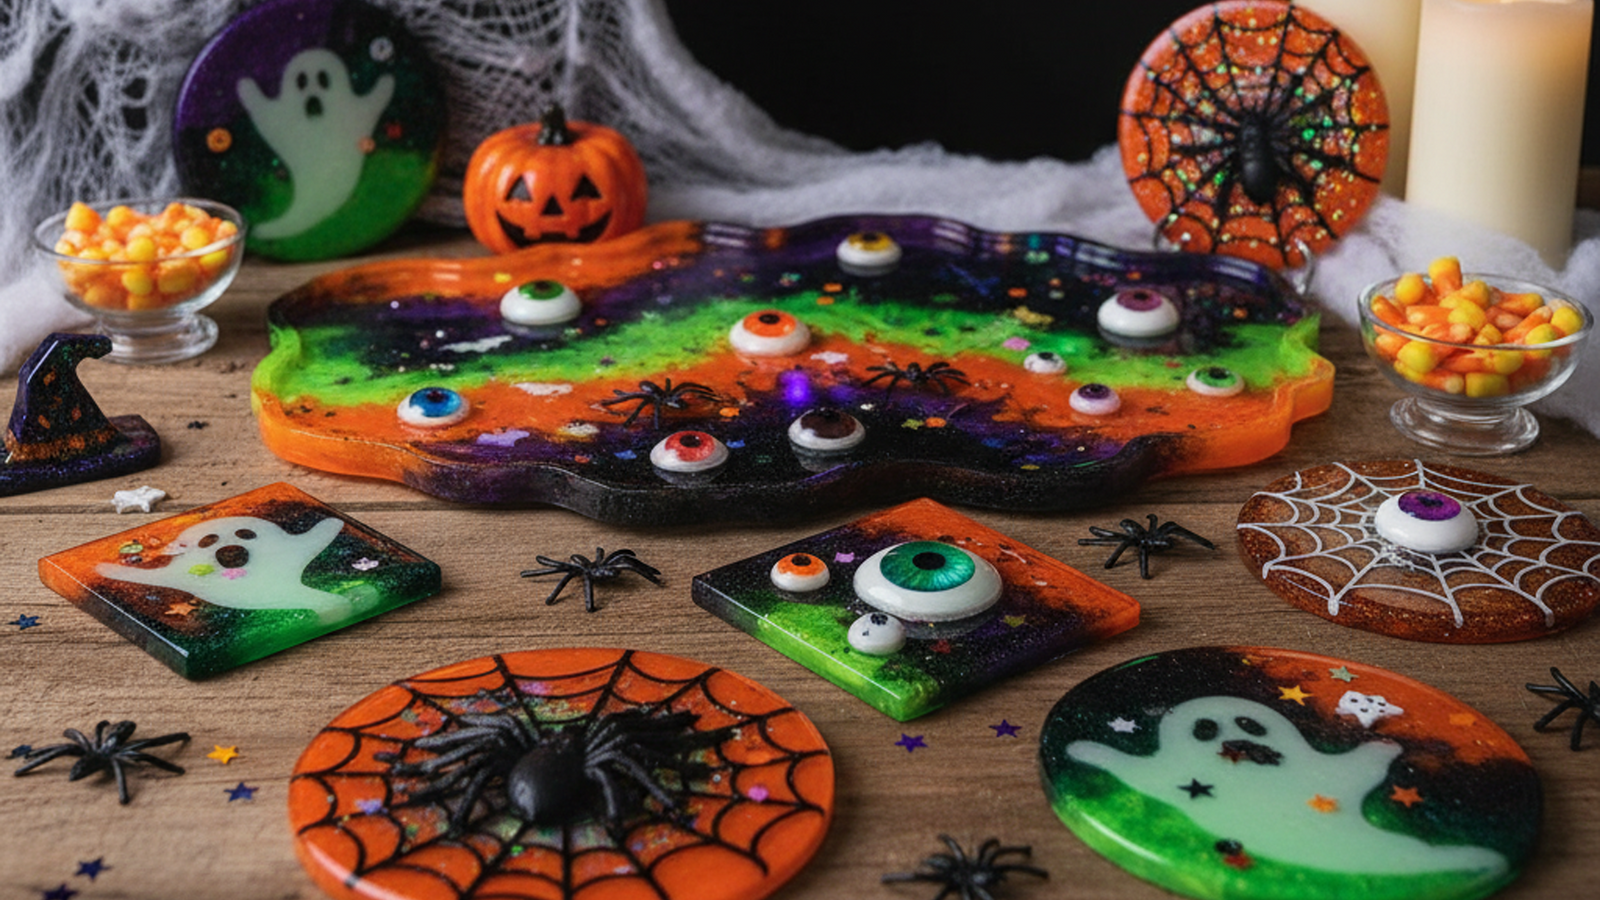
Halloween brings out the creative spirit in all of us—and resin art is the perfect way to craft eerie, eye-catching decorations that last for years. This versatile medium has become a favorite among DIY artists for creating professional-looking pieces that outshine store-bought décor.
Working with epoxy resin opens endless possibilities for Halloween creativity. Capture floating ghosts in crystal-clear layers, embed tiny pumpkins in amber hues, or make coasters that seem to glow from within. The beauty of resin art lies in its ability to preserve your Halloween vision in a durable, glossy form.
Whether you’re an experienced maker or a curious beginner, this guide will help you create haunting masterpieces using Easy Pour Tabletop Epoxy—a resin trusted for its clarity, durability, and easy 1:1 mix ratio.
Essential Materials & Safety First
Before starting your spooky resin creations, it’s crucial to gather the right supplies and follow safety guidelines.
You’ll Need:
· Premium epoxy resin (like Easy Pour Epoxy for professional results)
· Silicone molds in Halloween shapes
· Mixing cups and stir sticks
· Heat gun or torch for bubble removal
· Disposable gloves and protective eyewear
Safety Tips:
Always work in a well-ventilated area away from children and pets. Wear nitrile gloves, safety glasses, and a respirator mask. Maintain a clean workspace and keep paper towels handy for spills.
Resin performs best in temperatures between 70–75°F and low humidity. Cold slows curing, while excessive heat can cause yellowing or uneven results.
Step-by-Step Halloween Resin Projects
Start by mixing your Easy Pour Tabletop Epoxy following the 1:1 ratio by volume. Stir slowly for about five minutes to ensure the components are fully blended.
👻 Ghost Coasters
1. Pour a thin base layer of clear resin into round molds.
2. Once tacky (about 30 minutes), use a toothpick to draw ghost shapes with white pigment.
3. Add tiny black dots for eyes and let cure completely.
🎃 Pumpkin Pendants
1. Tint resin with orange alcohol ink or dye.
2. Fill molds halfway, then use a toothpick to create pumpkin ridges.
3. Add a small piece of green or brown material for the stem.
🦇 Bat Silhouettes
1. Pour the first clear layer and allow it to become tacky.
2. Place black vinyl or treated paper bat cutouts.
3. Add the final clear layer for a “frozen-in-flight” effect.
Halloween Enhancement Techniques
Give your projects that extra Halloween flair with these creative resin effects.
✨ Glow-in-the-Dark Powder:
Mix a small amount into your resin for a haunting glow. Charge pieces under bright light before displaying.
🧙 Glitter & Metallic Finishes:
Use Halloween colors—orange, purple, black, and green—for sparkle and depth. Mica powders create soft shimmer and highlight details beautifully.
🕷️ Embedded Objects:
Add tiny spiders, leaves, or candy corn when resin reaches a honey-like consistency. This prevents sinking and keeps the objects suspended.
Finishing & Display Tips
After curing for 24–48 hours, demold carefully. Sand edges with fine-grit sandpaper and polish for a glossy finish. For extra shine, add a thin flood coat of clear resin.
Display Ideas:
· Backlight translucent pieces with LED strips.
· Arrange different shapes together for dramatic visual impact.
· Use resin coasters for seasonal table settings or create wearable Halloween jewelry.
Storage & Care:
Clean finished pieces with mild soap and water. Avoid harsh chemicals, and wrap them in tissue when storing to prevent scratches.
Unleash Your Spooky Side
Resin art is about experimentation, creativity, and fun. Each pour teaches you something new—and sometimes, unexpected results make the best designs.
With Easy Pour Epoxy, you’ll achieve crystal-clear results that highlight every eerie detail. Start with a simple mold, play with color, and watch your Halloween imagination come to life.
Your haunted masterpieces will shine for many Halloweens to come! 🎃

